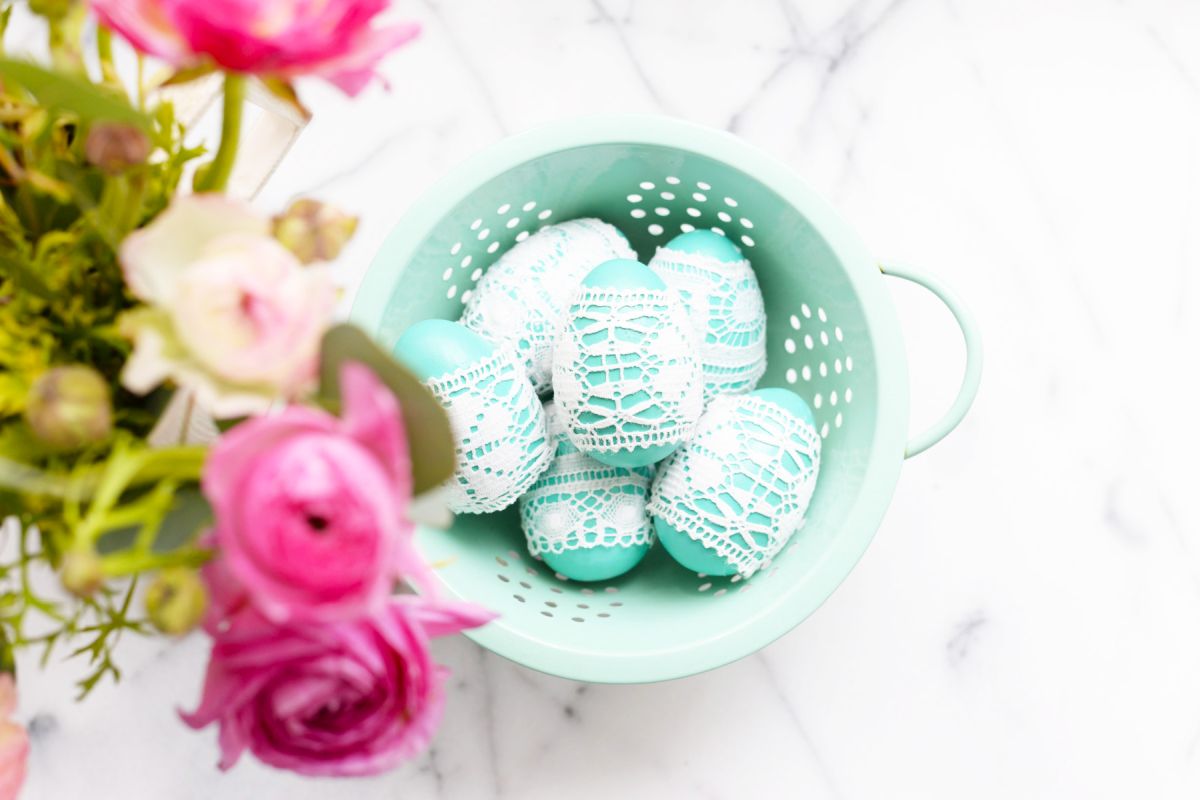
Lace DIY Easter Eggs
Easter is around the corner and it's time to get creative with those eggs! To create your own elegant DIY Easter eggs (that brand the perfect table centerpiece when gathered together in a nice bowl), simply add a little colour and lace! This fun and festive activeness project is and so easy y'all'll take fourth dimension left over to actually dip dye those existent eggs with your kids and you'll have these leftovers to bring out next year!
 View in gallery
 Supplies for Lace DIY Easter Eggs:
- Wooden eggs
- Colorful spray paint (or acrylic castor on paint if preferred)
- Modge Podge or other mucilage that dries articulate
- Foam castor
- Lace (hither nosotros used lace trim)
- Sewing scissors
- Clear polyurethane finish
- Egg carton
 View in gallery
 Lace DIY Easter Eggs Instructions:
Step 1: Pigment the eggs
Start by painting your wooden eggs. An like shooting fish in a barrel mode to do this is to lay each forest egg out on an upside downward egg carton (that you don't care almost anymore equally it'south about to get messy) and spray a very thin coat of spray paint over the eggs. Wait until dry, flip over, and do the same to the other side.
Proceed rotating the egg and spraying until the egg is fully covered and paint is evenly practical. If your pigment drips yous can sand it down with sparse grit sandpaper before reapplying the side by side coat of paint. The other pick is to brush pain (a foam brush works well) the egg and let it dry.
 View in gallery
 Step 2: Cut the lace
One time the eggs are painted (here we went with a solid teal hue simply yous could get artistic and do multiple dissimilar colors in your favorite pastels or fifty-fifty keep the woods au natural!), add the lace. Cut a piece of lace proportional to your egg with your sewing scissors.
Step 3: Wrap lace around the egg
Adhere the lace to the egg with a thin glaze of Modge Podge practical to the office of the lace that will stick against the egg. Manipulate the lace and so that it wraps effectually the egg evenly and gathers at the back of the egg (so your eggs volition present belly up). Let dry
 View in gallery
 Step iv: Add together some gloss
Optionally, add a thin coat of polyurethane finish to your eggs (this will add together a little scrap of polish if you use a gloss or semi-gloss). Over again use the back of your egg carton to spray the eggs. Let dry and display for the big day!
 View in gallery
  View in gallery
 Source: https://www.homedit.com/lace-easter-eggs/
0 Response to "Lace DIY Easter Eggs"
Post a Comment